How to Boost Video Quality in 2025: AI-Powered Techniques & Tools
As UHD screens and AI technology in platforms become common, it is now expected that video quality will be the best. Since most people are using video on their phones, reviving old videos or making them social media ready, it is now a key requirement to boost video quality.
Now, in 2025, we don’t just have to rely on manual filters or simple upscaling. Today, it’s possible to instantly improve grain, sharpen video footage, and make everything clearer, all by using the 4DDiG Video Enhancer and a few clicks. This guide tells you step by step how to achieve it.
Part 1. Why You Need to Improve Video Quality
There are several reasons why video upscaling software matters so much in 2025.
- The fact that 4K and 8K displays are popular now means that the outdated and unclear content looks bad.
- Instagram, TikTok, and YouTube focus on presenting attractive content that is easy to see in good resolution.
- Cameras often create grain and noticeable noise in their recorded videos when operating in poor lighting.
- Devices that are not new and flash video encoded poorly can cause compression artifacts.
- Many times, motion appears wobbly or blurry when recorded with a handheld device.
Meta Description:
Let us review ways to use AI for video enhancement, give manual editing tips and features. Find out how to boost video quality, remove noise from, stabilize and adjust colors in your videos like a professional.
Part 2. Understanding the Key Quality Factors
You should find out what can boost video quality before you try to improve it.
- To have clearer results, high resolution is needed, but they will require a higher bitrate too.
- Video noise and grain are most often the result of being filmed in low light or when the video file is compressed incorrectly.
- Using sharpening improves how sharp your video appears but overdoing it can lead to mistakes that look fake.
- If a video is unstable, it’s because the camera isn’t stable. Corners of a video are only smooth when the footage is constant, and the frame rate is high.
Part 3. Manual Methods & Built-In Software Features
For those comfortable with manual control or who like to get involved in video adjustments, these types of tools let you get the results you want.
With both high-level apps such as Adobe Premiere Pro and simple-to-use tools such as DaVinci Resolve, these methods enable you to improve your videos by fixing blur, noise, and shakiness.
3.1 Adobe Premiere Pro & After Effects
Using Adobe’s leading applications, editors have complete command over the editing process. These tools are designed for professionals and anyone who wants extreme precision with their videos.
· Detail-preserving Upscale effect
Best for increasing the quality of video without making artifacts obvious.
- Import the video to After Effects, and Apply “Detail-preserving Upscale” from the “Effects” panel.
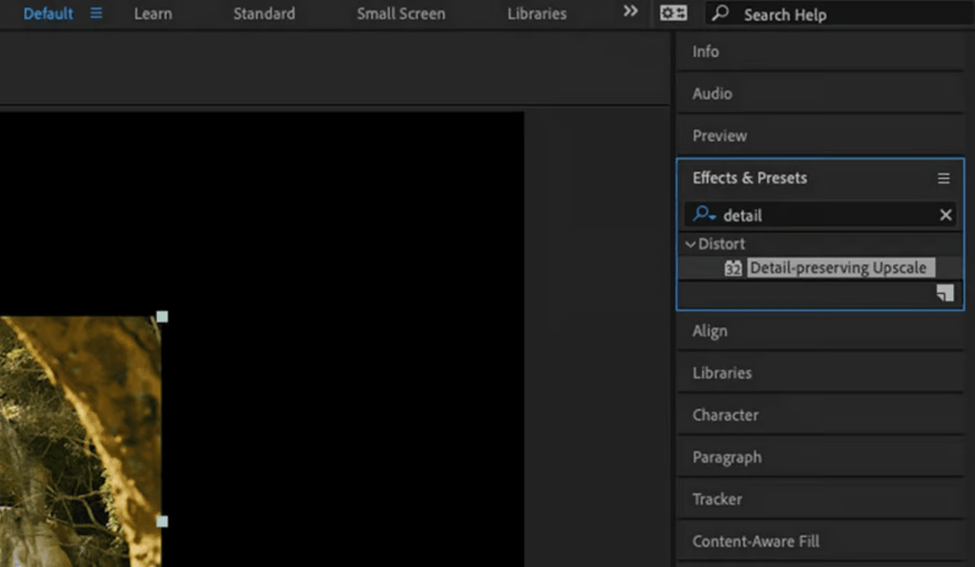
- Adjust scale and detail sharpness to your liking
· Reduce Grain and Sharpen filters
Decreases the amount of camera noise in videos shot in dim light.
- Add “Reduce Grain” and “Sharpen” filters from the “Effects” panel.
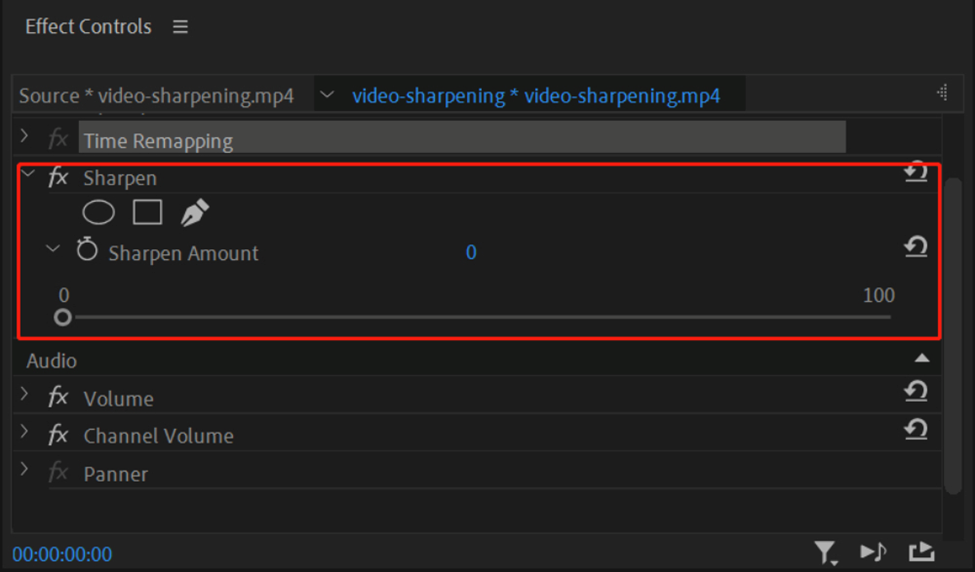
- Tweak temporal/spatial settings to reduce noise.
· Warp Stabilizer for smooth motion
Slightly better outline for your subject but avoid too much to prevent haloes.
- Drag “Warp Stabilizer” onto the clip from “Effects”
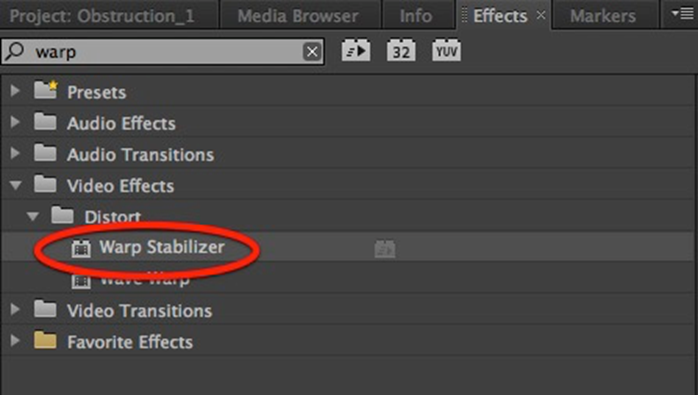
- Choose “Smooth Motion” or “No Motion” based on the video
3.2 Free & Open-Source Alternatives
Even without Adobe’s tools, people can use a range of free and open-source programs to boost video quality. This kind of option is great for people interested in videography, small creators and those on a budget.
· DaVinci Resolve’s Super Scale
Employs artificial intelligence to boost and enlarge the video.
- Right-click the clip in “Media Pool” > “Clip Attributes”
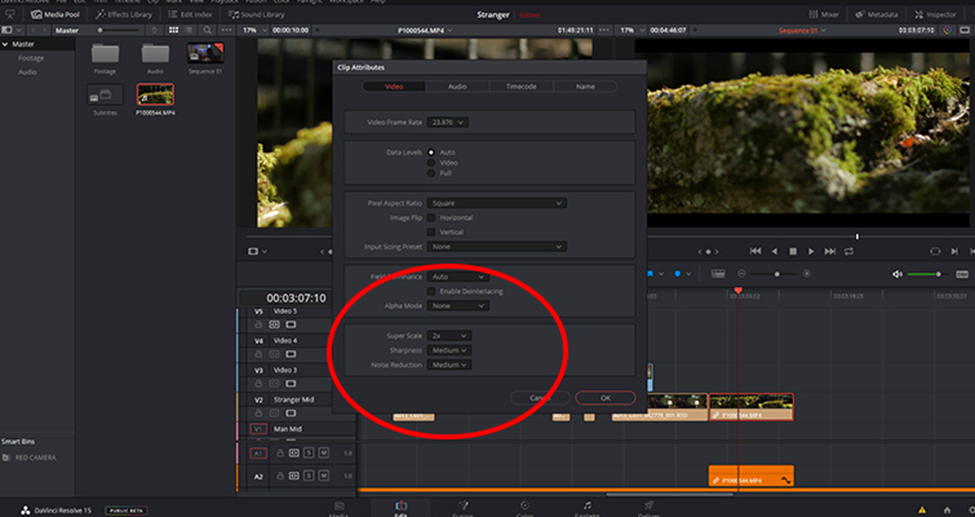
2. Under Video, choose “Super Scale” and set the enhancement level
· Shortcuts high-quality export presets
It allows you to render at advanced settings with only a little quality decrease.
- Import your video and apply filters/edits.
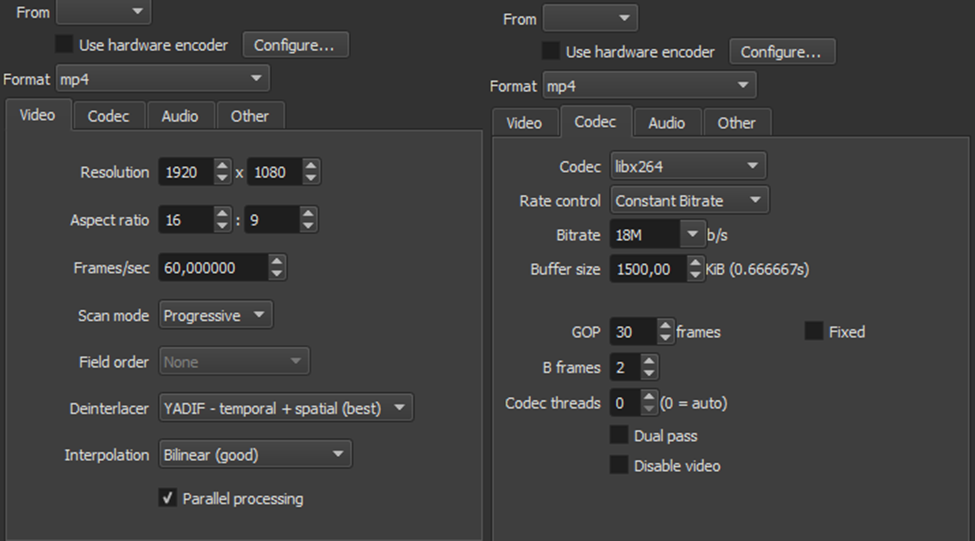
- When exporting, choose high resolution like 1080p/4K with improved quality settings.
· FFmpeg command-line sharpening and denoise
It does not have much weight, but a strong programmer’s tool for batch processing and more technical people.
- Install FFmpeg on your computer.
- Run the command to sharpen and denoise your video: “ffmpeg -i in.mkv -c:v libx265 -c:a copy -crf 28 out.mkv”
Part 4. Online Video Enhancement Services
Enhance your videos by using online tools that work immediately in your web browser. Individuals and content makers who want quick solutions to boost video quality can rely on Clideo, Kapwing and VEED.ai instead of installing software.
Features may differ among them, yet a lot of these tools use AI, filters and stabilize your content.
Pros:
- You don’t have to install anything, just use your internet browser on any device.
- It’s best for adjustments when you want to work on something fast.
- You will get beginner-friendly interfaces.
- There are some platforms available that incorporate tools using artificial intelligence.
Cons:
- Videos cannot be saved at high resolution or with very large files.
- Big files tend to take a while to either upload or download.
- Adding watermarks is possible unless you sign up for one of the premium plans.
- Privacy concerns when you publish videos that are private, personal, or sensitive.
Part 5. AI Solution – Recommended: 4DDiG Video Enhancer
4DDiG Video Enhancer provides quick and easy video improvement results using advanced AI. It can make your videos clearer, remove noise, make handheld videos steadier, and sharpen everything on your device for complete privacy. It is designed for artists of all backgrounds.
Why Choose 4DDiG Video Enhancer?
- Uses AI that has learned from a wide variety of scenes with low light, vintage and compressed video footage.
- With the effects in real-time, you can see what happens when you change them for sharpness, noise reduction, stabilize your video, or upscale its resolution.
- Accelerates enhancing multiple videos at once which makes it good for both professionals and businesses with heavy work requirements.
- Allows for output in 8K video and uses frame interpolation to make slow motion or low frame rate footage smoother.
Step-by-Step Guide:
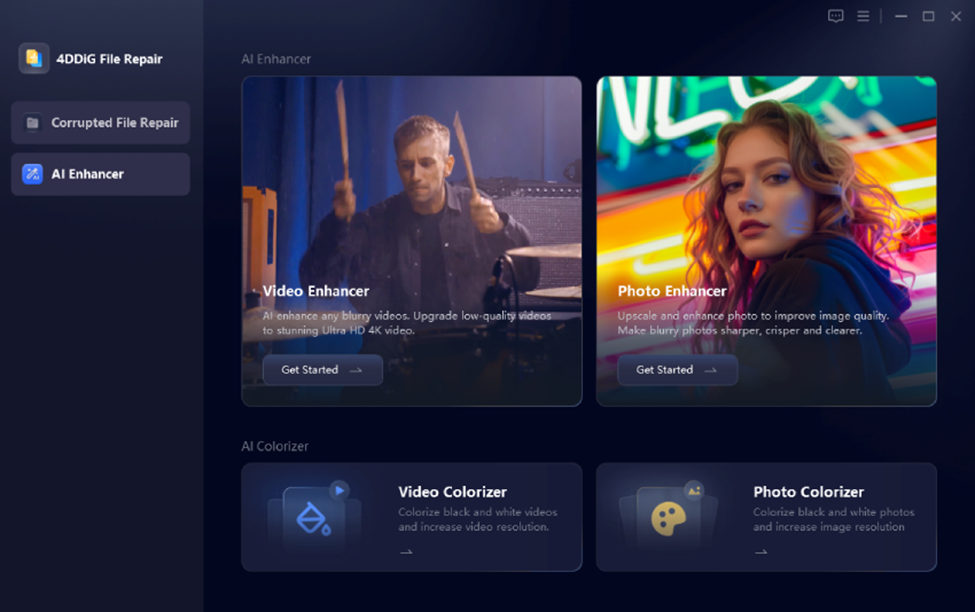
- Start the 4DDiG File Repair tool, then choose “AI Enhancer” and pick the “Video Enhancer” feature. Click “Add Videos” to select one or more videos for AI enhancement.
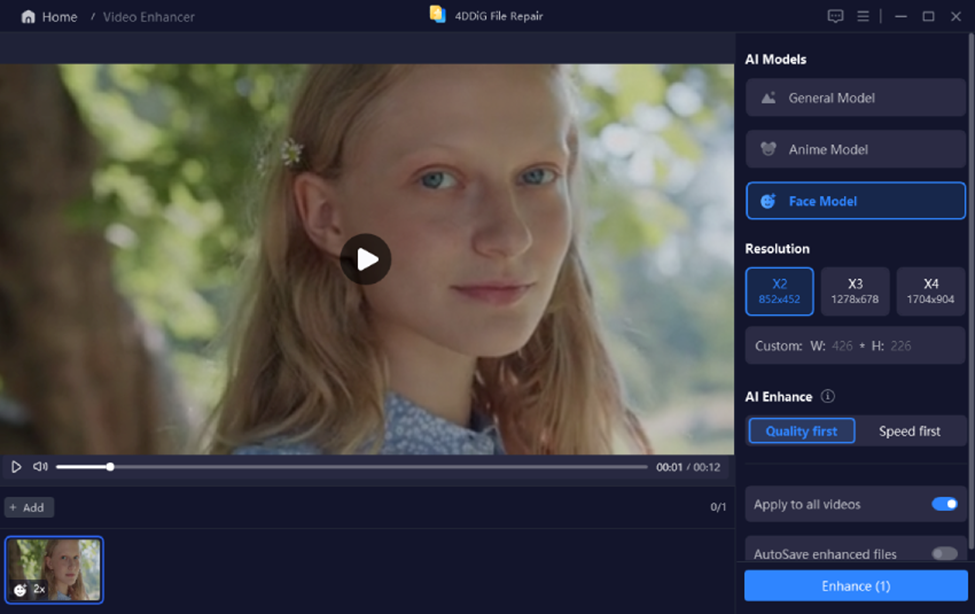
- Now, select your desired “Resolution”, “Enhancement option”, and “AI Model” before you click “Enhance”.
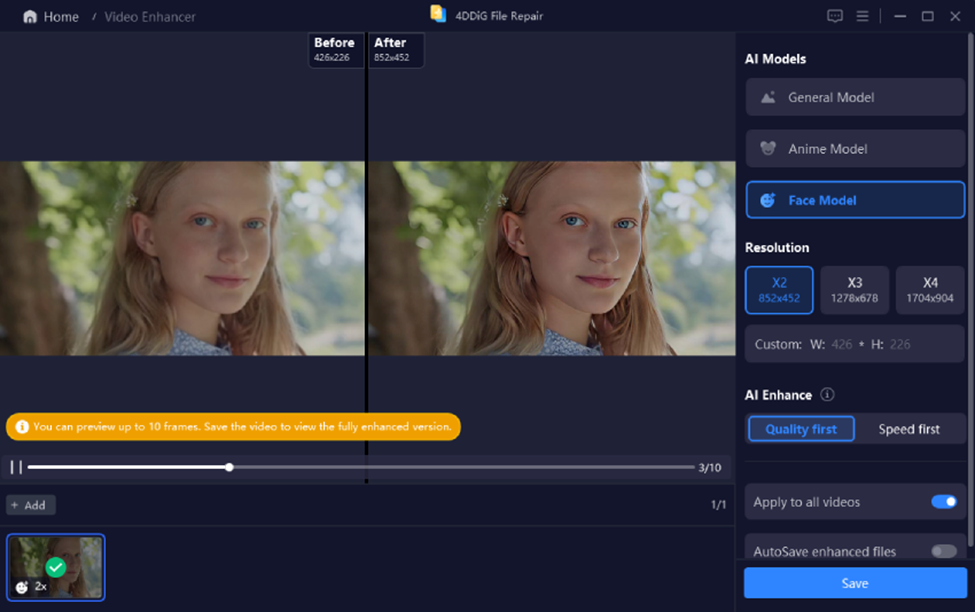
- See the results in a side-by-side preview and click “Save” once you are satisfied.
Part 6. Advanced AI Techniques
In the year 2025, AI does not only upscale or sharpen as it does today. These AI video enhancer tools use some effective techniques such as the ones described below.
- Every video frame is studied by the neural network to elevate the understanding of the content.
- AI takes care of better color grading and adjusts the tone of your video for HDR.
- Motion estimation keeps track of objects and ensures that each frame matches the previous one, preventing the exhibition of flicker or ghosting.
- They do all the hard work automatically and give anyone the same quality as a professional studio.
Part 7. Best Practices to Prevent Quality Loss
Fixing problems in post-production is useful but stopping them beforehand is even better. Do these simple things in your daily life so you do not have to use video upscaling software very often:
- Whenever possible, capture in the highest quality your camera can handle.
- Ensure the lighting is done right to keep your footage from being grainy or too dark.
- Use a tripod or a gimbal to stop your video from becoming blurry due to shaky hands.
- Always keep the raw files safe and use duplicate copies for all your processing, as working on the originals could damage them.
Part 8. FAQs
1. Will upscaling introduce artificial artifacts?
With today’s technology, like 4DDiG Video Enhancer, sharpness and artificial features are minimized. Even so, choosing to upconvert footage far outside its native resolution (for example, from 480p to 8K) can make a few textures look a bit off.
2. How long does AI processing take per minute of video?
Differences are based on resolution, the GPU used, and which effects have been selected. Because of AI power, 4DDiG Video Enhancer converts HD footage at one minute per 10-20 seconds maximum.
3. Is my footage secure on desktop apps vs. cloud services?
Since 4DDiG Video Enhancer runs directly on your computer, all your information stays safe there. As a result, this system is more private than having your information cloud-based.
Conclusion
Your video shouldn’t be blurry, noisy or shaky. If you work with social media, movies or advertising, it’s important to understand how to enhance your video quality. It’s possible for new users to change motion blur, boost video quality, and use AI to assist, with or without hands-on editing.
With 4DDiG Video Enhancer, complex editing tasks are easier, and the results are amazing. If you have either vintage VHS or recent smartphone videos, this program can upscale, smooth, stabilize and improve them in almost no time. If you want your videos to look better, give 4DDiG Video Enhancer a try right now, it provides clarity, better color and gives that cinematic look you want.
Mircari Quotes And Sayings
 Hybrid CNC Machines: Blending Additive and Subtractive for Innovation
 A Detailed Guide on the Invisalign Treatment Timeline in Surrey
 HCP Engagement Solution: Software Trends, Key Features, & Bridging the Gap in Pharma Marketing
 What Makes 9mm Ammo a Good Choice for Home Defense
 Staying Active and Healthy After a Vasectomy
 The Main Causes of Motorcycle Accidents
 Tweakvip Just Added Modern Warfare 2 To Their Platform
 How To Feel MOTIVATED To Study [EXPERT Tips]