Enhance Image Quality with Free AI Upscaling Tools
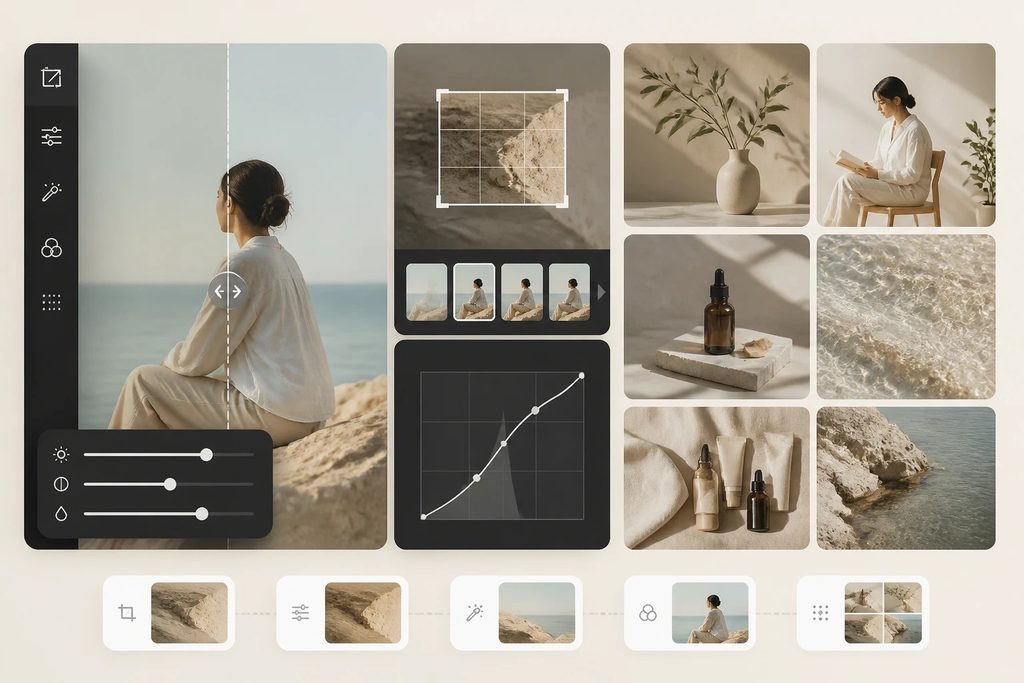
Blurry photos can ruin a great project. You might have an old photo that looks pixelated or a small graphic that needs to be larger for a website. Low resolution is a common problem for creators and casual users alike. You do not need expensive software to fix this anymore. Using a free online AI image upscaler helps you add detail and clarity to your files in seconds. These tools use smart algorithms to predict what missing pixels should look like.
Smart technology has changed how we handle digital media. You can now fix lighting or remove unwanted backgrounds using an AI photo editor online without needing a degree in graphic design. These tools analyze the content of your image and fill in the gaps that traditional resizing leaves behind. Instead of just stretching the pixels, the software recreates the texture and edges to make the image look natural.
Traditional resizing methods often leave you with a blurry mess. When you pull the corners of a small photo to make it bigger, the computer just makes the existing pixels larger. This results in jagged edges and a lack of detail. AI upscaling works differently because it has been trained on millions of high quality images. It understands what a human eye, a leaf, or a brick wall should look like. When it enlarges your photo, it draws in those missing details to keep everything sharp.
Step by Step Guide to Upscaling Your Images
Step 1: Choose Your Source Image
Start by picking the image you want to improve. It is best to use the original file if you have it. Avoid using images that have already been compressed many times, such as those sent through text messages or social media apps. The more data the AI has to work with at the start, the better your final result will be. Look for photos that are slightly blurry or too small for your current needs.
Step 2: Upload Your File
Navigate to your chosen upscaling tool and look for the upload button. Most tools allow you to drag and drop your file directly into the browser window. You should check the file size limits before you begin. Some free tools have a maximum megabyte limit per upload. Once the file is selected, the tool will prepare it for processing.
Step 3: Select the Magnification Level
Most AI tools give you options for how much you want to enlarge the image. Common choices include 2x, 4x, or even 8x magnification. You should choose the level that fits your specific needs. If you only need a slightly larger photo for a blog post, 2x is usually enough. If you are planning to print a small photo on a large poster, you might need 4x or higher. Keep in mind that higher magnification takes longer to process.
Step 4: Adjust the Noise Reduction Settings
Many upscalers include a setting for noise reduction. Noise refers to the grainy texture you often see in photos taken in low light. If your original photo is very grainy, you should set the noise reduction to a medium or high level. If the photo is already clean, keep this setting low to avoid losing fine details. The AI will try to balance sharpness with smoothness.
Step 5: Start the Processing
Click the button to start the enhancement. The AI will now analyze every pixel in your image. It compares your photo to its database of visual patterns. You might have to wait a few seconds or a minute depending on the size of the file. The server does all the heavy lifting, so your computer speed does not matter much during this stage.
Step 6: Preview and Download
Once the process finishes, most tools show you a side by side comparison. You can see the original version next to the new, upscaled version. Look closely at the edges and textures to make sure they look natural. If you are happy with the result, click the download button. Save the file as a PNG if you want to keep the highest quality, or a JPG if you need a smaller file size for the web.
Tips and Best Practices for Better Results
To get the best results, you should always start with the cleanest image possible. AI is powerful, but it cannot create something out of nothing. If a photo is extremely blurry or completely out of focus, the tool might create strange artifacts. Try to use images that are clear but just too small for your project.
Pay attention to the lighting in your original photo. AI tools work best when there is a clear distinction between the subject and the background. If the lighting is very flat or the colors are washed out, the upscaler might struggle to define the edges correctly. You can always use a basic editor to fix the contrast before you upload the file to the upscaler.
Think about the final use of your image. If you are printing the photo, you need a much higher resolution than you do for a screen. A standard computer screen only needs 72 dots per inch, but a printer usually needs 300 dots per inch. Use the AI tool to reach that 300 mark so your prints look professional and crisp.
| Feature | Traditional Resizing | AI Upscaling |
| Method | Stretches pixels | Adds new pixels |
| Edge Quality | Jagged and blurry | Sharp and defined |
| Texture | Lost or pixelated | Recreated and smooth |
| Best For | Quick drafts | Final projects |
| Processing Power | Low | High (Cloud based) |
Common Mistakes to Avoid
One common mistake is upscaling an image too many times. You might think that running a photo through the tool three times will make it look perfect, but this often backfires. Each pass through the AI can add small errors or make the image look like a painting rather than a photo. It is usually better to do one large jump in size rather than several small ones.
Another mistake is ignoring the aspect ratio. Some tools might try to crop your image to fit a specific shape. Always check the settings to ensure your image stays in its original proportions. You do not want your subjects to look stretched or squashed after the enhancement is done.
Do not forget to keep your original files. Sometimes the AI makes a mistake and creates a weird shape or texture in a specific part of the photo. If you have the original, you can try again with different settings. Never overwrite your only copy of a precious memory with an AI version until you are sure the result is perfect.
Avoid using upscalers on images that have a lot of text. AI is getting better at reading, but it can still turn letters into strange symbols when it tries to enlarge them. If your graphic has a lot of writing, you might need to retype the text after you upscale the background image. This ensures the words stay legible and sharp.
Conclusion
Enhancing your images does not have to be a difficult task. With the right free tools, you can turn small, blurry files into high quality visuals for any project. You just need to follow a simple process of uploading, selecting your settings, and letting the AI do the work. Remember to start with the best file you have and avoid over processing your photos. By following these steps, you can save old photos and improve your digital designs without spending a dime on professional software. Start experimenting with your own images today and see how much detail you can recover.
Mircari Quotes And Sayings
 Blue Wall Paint Trends and Tips: Choosing the Perfect Wall Paint
 How A San Antonio Injury Lawyer Can Help You After An Accident
 Common Car Wreck Injuries
 How to Make Your Cornhole Games More Fun with Themed Bags
 Alexander Ostrovskiy: 10 Glute Exercises You’re Not Doing (But Should Be)
 Can video games replace traditional teaching methods?
 Top 5 Tension Fabric Display Suppliers in Singapore
 How to Focus on Studying for Successful Admission