How to Turn Smartphone Photos into Professional Instagram Content [2026]
You capture a moment on your phone—a product shot, a selfie, a flat lay, or a street scene. In person, it looks great. On your phone screen, it’s decent. But when you post it to Instagram, something feels off. The colors seem flat, the details look soft, and the overall impression falls short of the polished content that dominates your feed.
This is the reality for most Instagram creators. Professional photography once required expensive cameras, lighting equipment, and years of experience. Today, AI-powered enhancement tools have bridged that gap—transforming ordinary smartphone photos into content that looks like it was shot in a professional studio.
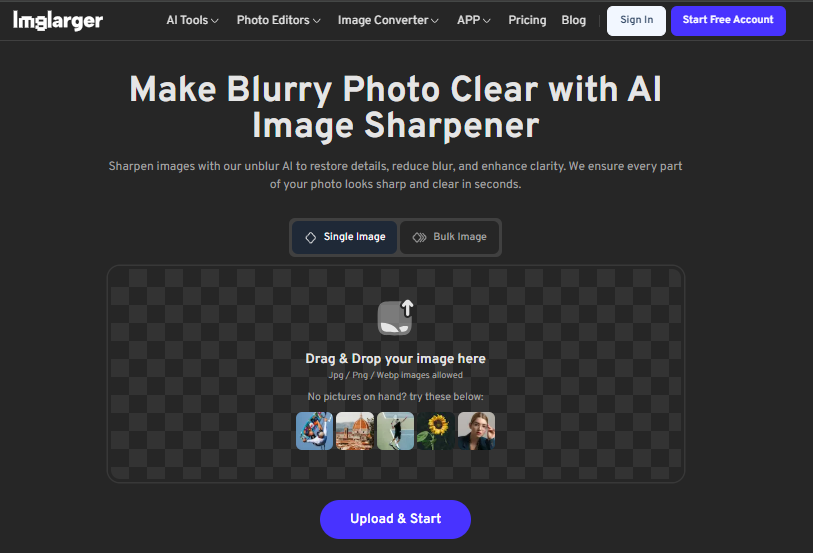
Imglarger is an all-in-one AI platform that enhances, upscales, and refines your mobile photos before they ever reach Instagram. Whether you’re a small business owner, content creator, or someone who simply wants their personal photos to look their best, AI enhancement delivers professional results in seconds.
This guide covers why smartphone photos struggle on Instagram, how AI enhancement fixes the problem, and a step-by-step process you can use immediately.
Why Smartphone Photos Often Look Amateur on Instagram
Instagram has evolved into a highly competitive visual platform. The top content in any niche is sharp, vibrant, and professionally produced. Smartphone photos, by contrast, face several inherent challenges that can make them look amateur by comparison.
Common quality issues with mobile photography:
Limited camera hardware
Unless you’re using a flagship phone from the last year or two, your camera hardware is likely limited. Lower-resolution sensors, smaller apertures, and less powerful image processors produce photos that lack the sharpness and dynamic range of professional cameras. The result is obvious when your photo appears alongside professionally shot content in someone’s feed.
Poor lighting conditions
Most phone cameras struggle in anything less than ideal lighting. Indoor shots, evening photos, and images taken in shadow often end up with noticeable noise, grain, or muddy colors. Instagram’s compression algorithms make these problems worse, not better.
Image compression
Phones often compress photos to save storage space, particularly if you’re using older models or certain settings. This compression introduces artifacts—blocky patterns, color banding, and loss of fine detail that become very visible on Instagram’s platform.
Suboptimal camera settings
Auto mode on most phones prioritizes convenience over quality. Misconfigured exposure, white balance, and focus settings can leave you with photos that are too bright, too dark, or strangely tinted. By the time you notice the problem, the moment has passed.
Low resolution for modern displays
Instagram now supports high-resolution displays up to 4K on supported devices. A photo that looked sharp on your phone’s screen might appear pixelated or blurry when viewed on a modern tablet, desktop monitor, or high-end smartphone. The platform’s minimum resolution is 1080px on the longest edge, but for truly professional appearance, you want significantly more.
How AI Enhancement Transforms Mobile Photos
AI-powered enhancement tools like Imglarger work differently than traditional photo editing apps. Filters and basic adjustments apply the same effect to every photo regardless of content. AI analyzes your specific image and makes intelligent improvements based on what it detects.
What AI enhancement actually does:
Upscales resolution without losing quality
Traditional upscaling copies pixels, creating a blurry mess. AI image upscaling reconstructs fine detail—sharpening edges, enhancing textures, and preserving clarity even at significantly higher resolutions. A 1080×1080 photo can become 2160×2160 or higher while looking sharper, not softer.
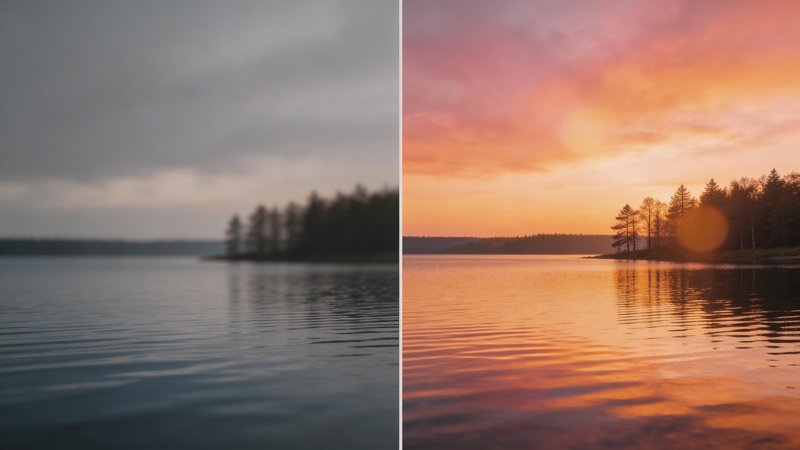
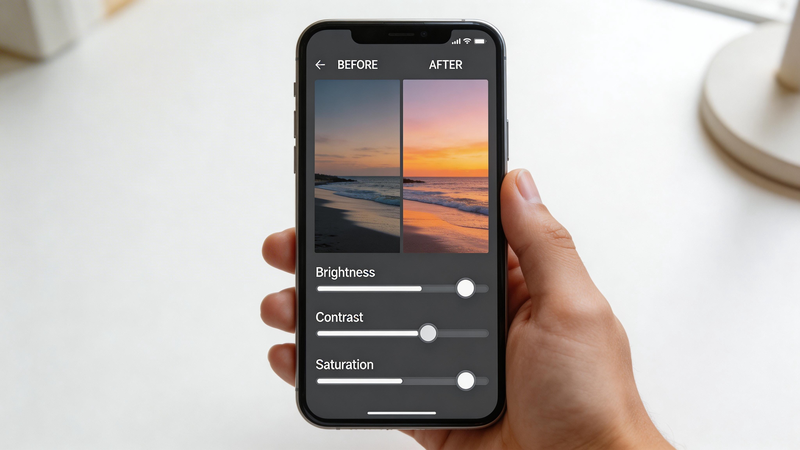
Enhances colors and contrast
AI models recognize when colors appear flat or washed out and automatically boost saturation, vibrance, and contrast to appropriate levels. Skin tones look natural, product colors are accurate, and the overall image has the pop that catches attention in a crowded feed.
Reduces noise and grain
Low-light photos often show visible noise or grain. AI denoising preserves detail while smoothing out these artifacts, producing clean, professional-looking images even from challenging shooting conditions.
Sharpens blurred details
Slight motion blur, focus issues, or soft edges from upscaling are all common problems that AI sharpening can fix. Even images that have been heavily processed or stylized—such as those converted with an image to pixel tool—can sometimes lose clarity or appear soft. In these cases, an AI sharpener like Imglarger can identify where detail should be and reconstruct it, making your images look crisp rather than muddy.
Optimizes for Instagram’s requirements
Imglarger allows you to export at exactly the right resolution and aspect ratio for Instagram (1:1 for feed posts, 4:5 for taller portraits, 9:16 for Stories). No resizing after the fact, no quality loss from repeated edits—just output that’s ready to upload.
The practical outcome: smartphone photos that hold their own against professionally shot content. Not by faking quality, but by bringing out the best in what you captured.
Step-by-Step: Enhancing Smartphone Photos with Imglarger
The entire process takes less than two minutes from start to finish.
Step 1: Capture and transfer your photo
Start with the best possible source. Use your phone’s default camera app rather than Instagram’s built-in camera (third-party apps often apply additional compression). If you have the option, shoot in your phone’s highest resolution mode and avoid using digital zoom, which simply crops and upscales.
Transfer the photo to your device. Imglarger is browser-based, so you can enhance on desktop or mobile. For many users, it’s faster to AirDrop or email the photo to a computer, but the platform works equally well on a phone browser.
Step 2: Go to Imglarger and select your tool
Navigate to Imglarger and you’ll see three categories: AI Tools, Image Editing Tools, and Image Converters. For smartphone photos, you’ll typically use one of the following:
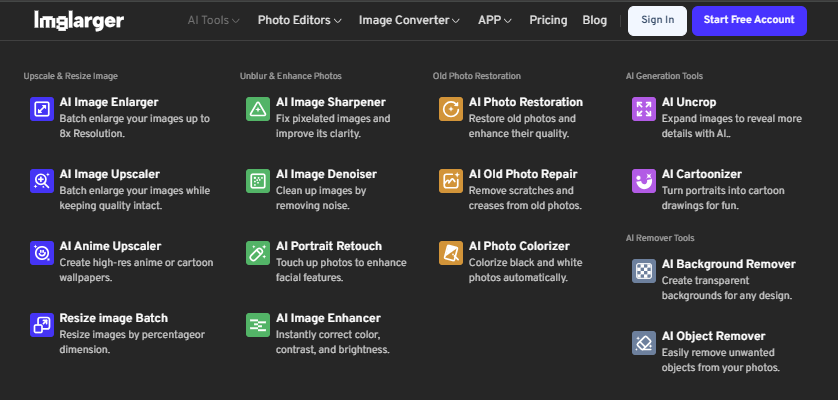
– AI Image Enhancer – The all-purpose quality booster. Improves colors, sharpness, and overall clarity without changing resolution.
– AI Image Enlarger – Use this when your photo is too small for Instagram (anything below 1080px on the longest edge). Upscales by 200%, 400%, or up to 800%.
– AI Image Sharpener – Targets blurry images specifically. Restores clarity and definition.
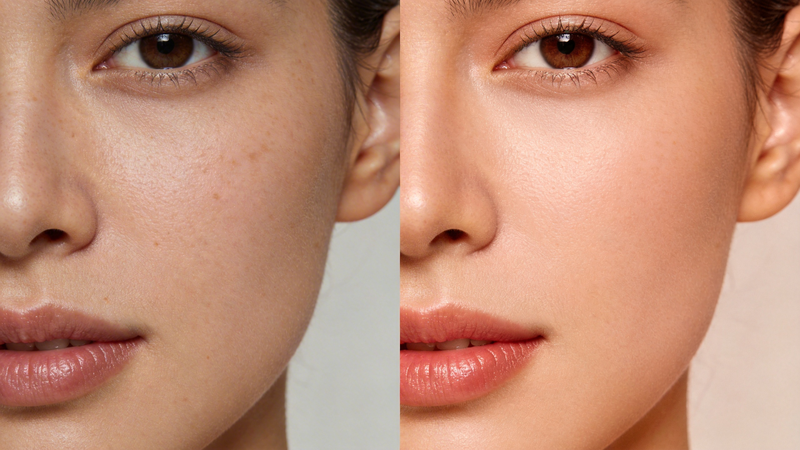
– AI Portrait Retouch – Optimized for faces. Enhances facial details, smooths skin, and improves portrait quality.
– AI Image Denoiser – Removes noise and grain from low-light photos.
Not sure which to choose? AI Image Enhancer is the best starting point for most smartphone photos—it provides a balanced improvement across multiple quality factors.
Step 3: Upload your photo

Click the upload area or drag and drop your image into the workspace. Imglarger supports JPG, PNG, and WebP formats—the three formats most commonly used by smartphone cameras.
Free users can process images up to 3000px, which covers the vast majority of smartphone photos. Premium subscribers can handle larger files up to 4000×4000 and unlock batch processing for multiple photos at once.
Step 4: Configure your settings
Settings vary by tool, but here’s what to consider for Instagram content:
For AI Image Enhancer:
- – No manual configuration needed. The AI analyzes your photo and applies appropriate enhancements automatically.
- – Works on skin tones, colors, contrast, and overall clarity in a single pass.
For AI Image Enlarger:
– 200% upscaling is ideal for most smartphone photos. A 1080×1080 image becomes 2160×2160—well above Instagram’s minimum with room to spare for compression.
– 400% if you’re starting from a very small source (720px or below on the longest edge).
– 800% is available for premium users but is overkill for most Instagram use cases.
For AI Image Sharpener:
- – Automatic detection and sharpening—no settings to adjust.
For AI Portrait Retouch:
- – Optimized specifically for faces. Great for selfies, headshots, and any photo where a person is the focal point.
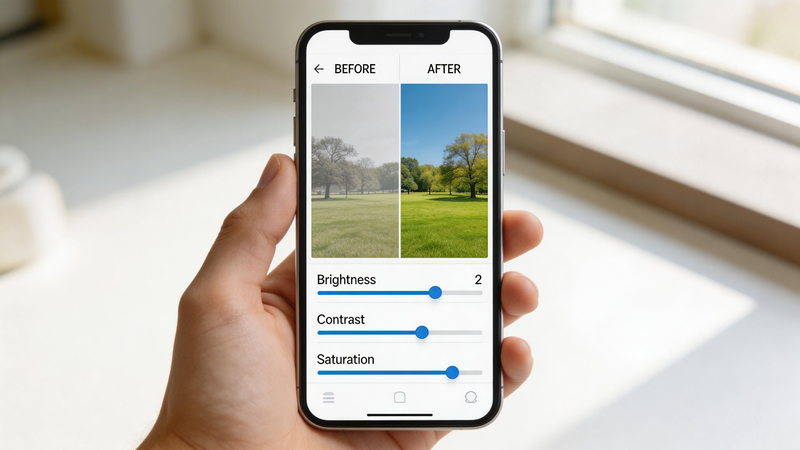
Step 5: Process and download
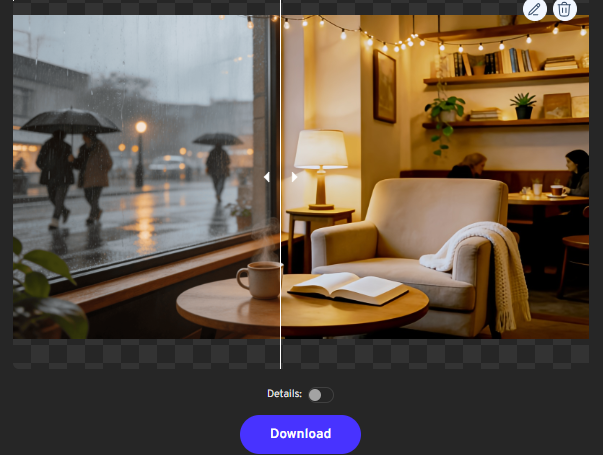
Once finished, you’ll see a before-and-after comparison. When you’re happy with the output, click Download to save the enhanced photo to your device. The file is now ready to upload directly to Instagram.
Step 6: Upload to Instagram
Open Instagram and upload your enhanced photo as you normally would. Because you’ve already optimized resolution, sharpness, and color quality, you’ll notice the difference immediately—both in the preview and in how the image appears in your feed.
FAQ: AI Enhancement for Instagram Photos
Does AI enhancement actually improve engagement on Instagram?
Indirectly, yes. High-quality images signal professionalism and attention to detail—both factors that affect whether someone follows, likes, or saves your post. AI enhancement removes the “amateur” signal from low-quality photos, allowing your content and concept to shine. Engagement ultimately depends on your content quality, but enhancement removes a common barrier.
Will enhanced photos look fake or over-processed?
Not if you use the right tool and settings. Imglarger’s AI is designed to enhance, not transform. Colors become more vibrant but still natural. Details become sharper but not artificial. The goal is to bring out the best in your photo, not to create something that looks unrecognizable.
Can AI enhancement fix a badly composed photo?
No. AI enhancement improves quality, not composition. If your photo is poorly framed, has awkward cropping, or suffers from fundamental composition issues, enhancement won’t fix those problems. Focus on getting the shot right in-camera—then use enhancement to polish it.
Conclusion
Professional Instagram content is no longer the exclusive domain of professional photographers. AI image enhancement tools like Imglarger have democratized visual quality—anyone with a smartphone can produce sharp, vibrant, polished images that hold their own in any feed.
The process is simple: upload your photo, select the appropriate AI tool, download the enhanced result. No complex editing software, no photography expertise, no expensive equipment. Just better photos in seconds.
Your Instagram content deserves to look its best. Start enhancing your smartphone photos today with Imglarger’s free AI tools—and see the difference in your engagement.
Mircari Quotes And Sayings
 Modern Loneliness and the Rise of Paid Companionship Services
 The Comfort Routine People Are Turning To This Year
 What It Actually Takes to Restore a High-Pressure System Back to Full Strength
 Best Indoor Seeds: High-Yield Indoor Strains for Every Grower
 Why Settle for Boring? Building Features That Make Life More Fun
 Common Car Wreck Injuries
 How A San Antonio Injury Lawyer Can Help You After An Accident
 Blue Wall Paint Trends and Tips: Choosing the Perfect Wall Paint